Have you ever had this situation before: You’ve gone to a specialty cafe and had the most amazing light roast espresso. You buy their beans and take them home but for some reason, you can’t replicate this on your home espresso machine. By the time you get it dialed in, you’ve run out of beans and you have to start the whole process over again.
What’s going on? Why is it so difficult to dial in light roast coffees for espresso? That’s what I’m here to answer.
1. Ask at the Café
The first step is one you might not have thought of, but that I do for ALL coffees I buy from a cafe. Before I even get the beans home, I ask the barista what settings they use to dial in the beans. Do they dose a little higher, or what temperature do they extract at if you have that option on your home machine?
Rather than asking them for a specific grind setting when you probably have a different grinder at home, knowing if thyey dial coarser than average or finer than average is better so you can extrapolate for your grinder? This can help you dial in a lot sooner and save you a few shots at the start that you might have wasted going way too fine or way too coarse.
2. Know Thy Grinder
Next is to really get to know the range for espresso on your grinder so you can estimate a good starting point. If you know that the max you have ever needed is the range between 22 and 11, as mine is on my DF64, you can start in the right place.
This is a big one, a really underrated but incredibly useful bit of information is the altitude the coffee is grown at. You’ll see this number on a lot of packages of speciality coffee. I used to think that this was just to sound all speciality-ee and stuff, but it’s useful especially for light roasts because in general, the higher the elevation, the denser the coffee bean, and so more heat and finer grind you’ll use to extract all that goodness properly.
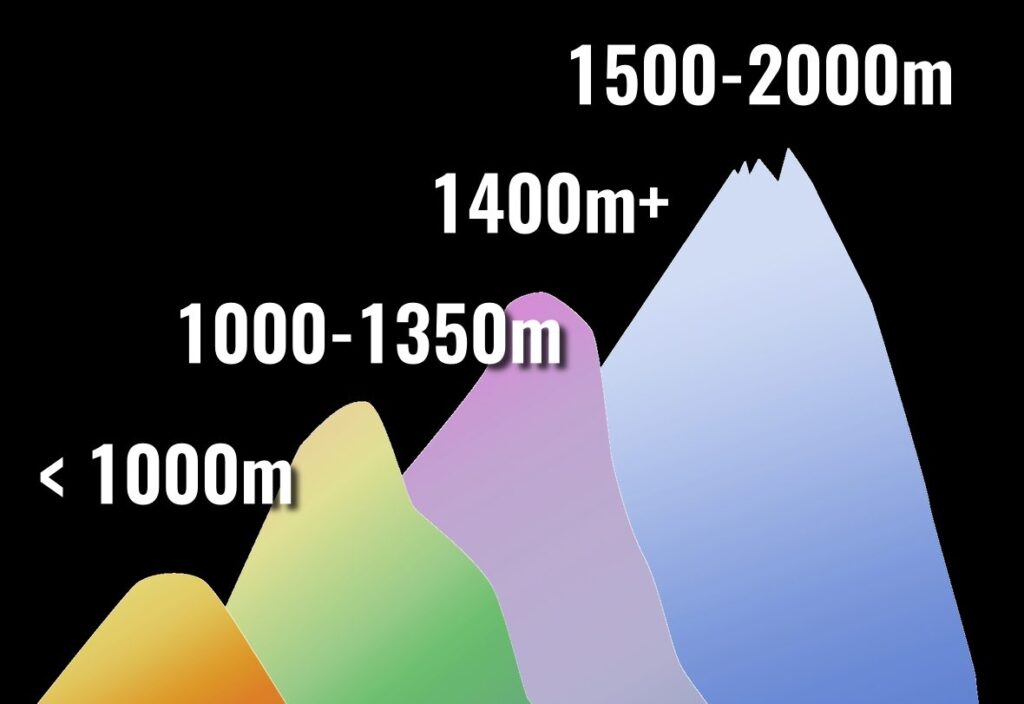
Basically anything below around 1000m above sea level is lower elevation and leads to a softer bean with sweeter but usually milder flavours, between 1000 and around 1350m is higher elevation and leads to a harder bean and more distinctive flavours, and above 1400m is very high elevation.
Some of the densest coffees might be grown at between 1500 to 2000 metres above sea level. This produces denser beans because at higher elevations there is much lower oxygen saturation. Combine that with a lighter roast and you have a very dense bean, because the roasting process also pulls moisture out of the bean, further reducing the density.
This might sound like too much science just to make a cup of Joe, but it gives you a ton of really relevant and useful info to get better shots from the very first pull, so factor in the elevation when you decide how fine to grind your coffee.
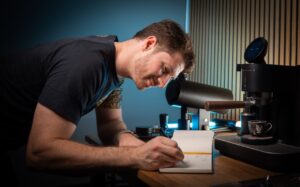
3. Take Notes
Next, take a note of your shots as you dial them in. I’ve been using a little book like this, and I have a downloadable sheet on my site you can get for free without signing up to anything with a layout that I use for checking my shots. Copy it, print it, or do it your own way, but it is really important to know when you got a good shot and what you did so you can do it again.
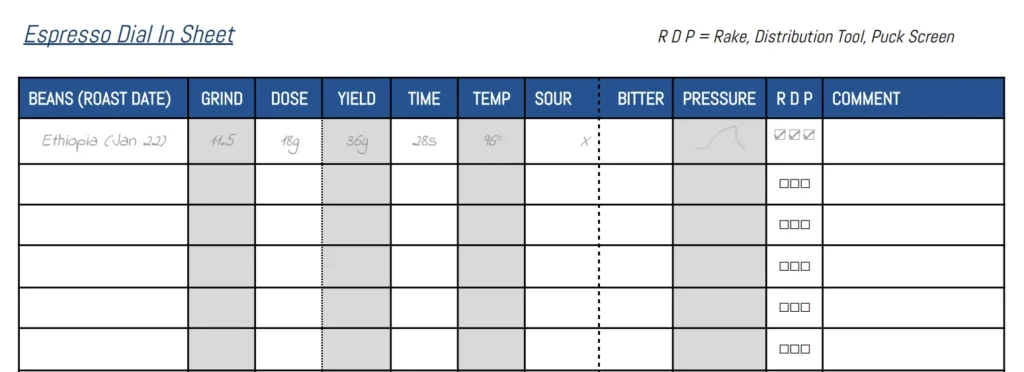
In short, you basically want to track your dose and grind settings, then your shot timings and yield at the end, and notice whether it is sour or bitter. This might sound simple but it makes a HUGE difference, especially if you’re using a low retention grinder and you switch between beans a lot.
You just check what you dialled in at before and whether it came out sour or bitter and you can adjust if needed, or roll back to a previous recipe. There are a lot of extra details you can add on here depending on what else you have control over, such as flow control or a “pressure profile” if you are using a manual or flow control enabled machine, and temperature if you have a PID and can control that.
Here’s a downloadable Espresso Dial-In Sheet that you can print and share with others (not for resale).
For those who want a more organized way to log brew variables, check out The Brew Ledger – a coffee journal with pre-formatted pages for tracking essentials like grind size, dose, yield, time, temperature… making it easier to refine your espresso, avoid wasting time and beans.
Want to make dialing in your espresso simpler?
The Brew Ledger is designed to help you track all your key brew settings with ease.
It helps you perfect your espresso drinks, saving you time, beans, and frustration.
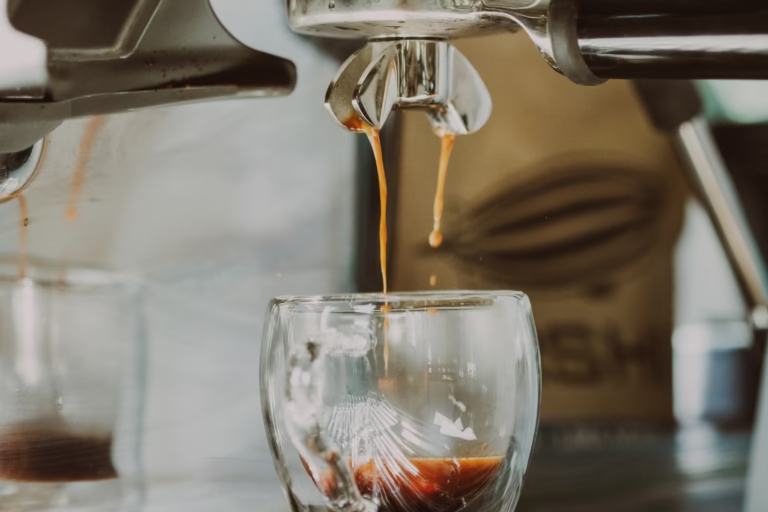
4. Experiment with Extraction Timings
Don’t be married to the standard shot timings. Sure, for most espressos getting a 1:2 ratio in 20-30 seconds is ideal, but I’ve found that especially for light beans I prefer the flavour of an espresso that extracts a little slower, or that I do as a bit of a ristretto in a similar time scale.
Experiment with what you like, and teach your palate to taste the difference between sour and bitter because sometimes they can get muddled if you’re not used to looking for that. It’s your coffee, so make it the way you like, not the way some dude on YouTube tells you to.
5. Temperature Is More Important With Light Roasts
If you are able to control temperature on your machine, a usual range for espresso is around 90-96°C, or 194-204°F. I don’t go hotter than around 96 degrees C and on average I’m at around 93°C for a standard medium or city roast.
For a super light roast that is also very dense and grown at high elevation, I’ll increase the temperature by a degree or two.
If I’m still getting a very sour espresso despite getting reasonable timings, I’ll bump it up another degree or two, or start higher to be on the safer side if I don’t have that much coffee to trial this out with.
6. A Coffee Gets Finer With Age
Finally it’s important to adjust your grind based on the age of the coffee.
For espresso it’s usually best to use beans that are between 7 days and around 40 days off the roast date, but the grind setting you need to use will change throughout that time, and you’ll need to dial ever so slightly finer every day or two to stick with your ideal timings and flavour profile.
The same is true of light roasts, though darker roasts tend to go stale more quickly. I usually grind a half step finer for every 4 or 5 days, but of course like all things in espresso, this is going to vary depending on the bean and the climate where you live.
Just take the age of the bean into consideration as well and using your note you can easily make a micro-adjustment finer as the coffee ages.
Final Thoughts
These are the general rules I follow for dialling in light roasted espresso, but there are a LOT of variables and your gear also has a significant impact on your ability to pull a good shot. If you want to know more about dialling in espresso in general, I laid out all of the variables that will help you dial in any roast level in this video over here.
If you found this useful, please go to the YouTube video at the top and give it a like as this tells YouTube to show it to more people, and subscribe if you aren’t already.
I hope this helped, and feel free to ask me any questions on my Instagram @homecafecharlie
Frequently Asked Questions
Does a light roast mean weak coffee?
No, a light roast doesn’t mean weak coffee. Light roasts have brighter, more complex flavors, often highlighting fruity or floral notes. “Weak coffee” usually refers to a low coffee-to-water ratio or under-extraction, not roast level. Light roasts can taste sour if under-extracted, which is why proper dialing in is crucial.
Which espresso roast is stronger?
If by “stronger” you mean caffeine content, light roasts contain slightly more caffeine than dark roasts by weight. However, dark roasts taste “stronger” due to bold, roasted flavors. Light roasts require careful dialing in to extract their complex flavors without under-extraction or sourness.
Is light roast okay for espresso?
Yes, light roasts work well for espresso but require:
- Finer grinding: Light roasts are denser and harder to extract.
- Higher temperatures: Super light or high-elevation beans may require brewing at 94–96°C.
- Experimentation: Light roast espresso can be more challenging but rewarding, offering unique flavors if extracted properly.
Do you grind light roast finer or coarser?
Light roasts typically require a finer grind due to their density and structure, especially for high-elevation beans. Ask the café barista about the grind coarseness they use as a reference, but always adjust for your specific grinder and machine.
How to make light roast coffee stronger?
To make light roast coffee stronger:
- Grind finer: This increases extraction.
- Increase brew temperature: Use 93–96°C to extract dense, high-elevation beans effectively.
- Adjust brew ratio: A 1:2 ratio is a good starting point, but consider a longer extraction for balanced flavors.
- Take notes: Tracking your adjustments can help you repeat successful results.
Is light roast harder to grind?
Yes, light roasts are harder to grind because they are denser. The altitude at which the coffee was grown can further increase density, requiring more precise grinding. Use a high-quality grinder with sharp burrs for consistent results.
What is the best ratio for light roast espresso?
A good starting point is a 1:2 ratio (e.g., 18g of coffee yielding 36g of espresso). However, denser, high-elevation beans may benefit from a slightly longer ratio (e.g., 1:2.5) to fully extract their flavors. Keep notes to track what works best for each bean.
Is light roast more or less bitter?
Light roasts are generally less bitter because they retain more natural sweetness and acidity. However, improper dialing in (e.g., under-extraction) can make them taste sour. Use higher brew temperatures and finer grinding to balance flavors.
Why do people drink light roast coffee?
People drink light roast coffee for:
- Complex flavors: Bright, fruity, floral, and nuanced profiles.
- Distinctiveness: Highlighting the origin and altitude of the beans.
- Exploration: Each cup offers unique characteristics based on the coffee’s elevation and roasting process.