So you want to roast coffee at home?
It’s not as hard as you might think, so whether you are roasting coffee in a frying pan and want to buy a home coffee roaster like this one, or you have one and want to get better results from it, read on to see how I get amazing coffee out of a Gene Cafe Roaster.
This isn’t a full tutorial on roasting – there are whole books written about the subject and I am in no way qualified to cover it as well as it has already been covered. I highly recommend Scott Rao’s “The Coffee Roaster’s Companion” and “Coffee Roasting” to learn much more. This is just some best practices for the Gene Cafe Roaster for use at home.
Buying Green Coffee Beans
First you need to source your green coffee beans. This is obviously one of the most important parts of your coffee roasting process, as you won’t be able to get wonderful amazing flavours out of cheap, old or low quality beans.
Here are a few places to source coffee beans depending on where you are in the world:
Wherever you buy your coffee beans, don’t be afraid to spend a bit more if you want some great coffee. I used to just buy the ¥1,500 per kilo batches from namamame, but when I started spending ¥2,500 on nicer beans I noticed way more interesting flavours and had a lot more fun with it.
Heat Up Your Machine
One of the biggest issues I see people facing with this machine is putting their beans in to a cold drum and just hitting the on button. This is a recipe for terrible tasting coffee, because you want to heat up the beans as fast as possible in the early stage to get to that caramelising point.
The temperature at which you drop the beans into the already heated drum is called the Charge Temperature and it is very important. I usually heat the drum to the full 250°C, which drops to around 200-210°C by the time I’ve pulled it out of the machine and put the beans in.
MAX Weight
Another thing you ought to do is go 10% under the max weight recommended for the Gene Cafe. I find that if I go all the way up to 200g, I get a much more uneven roast as some beans will receive less heating, and the roast will usually come out with more different brownish colours than would be ideal.
You want the roast to be as even as possible to reduce grassy notes in under-roasted beans, and bitter-charcoal in over-roasted beans. I always fill with 180g of green beans and the roast is very even.
Rate of Rise is CRITICAL (And Hard)
The Rate of Rise (ROR) is how quickly or slowly the temperature is rising as you are roasting. You might have seen a roasting chart as put out on a computer like this one below before:
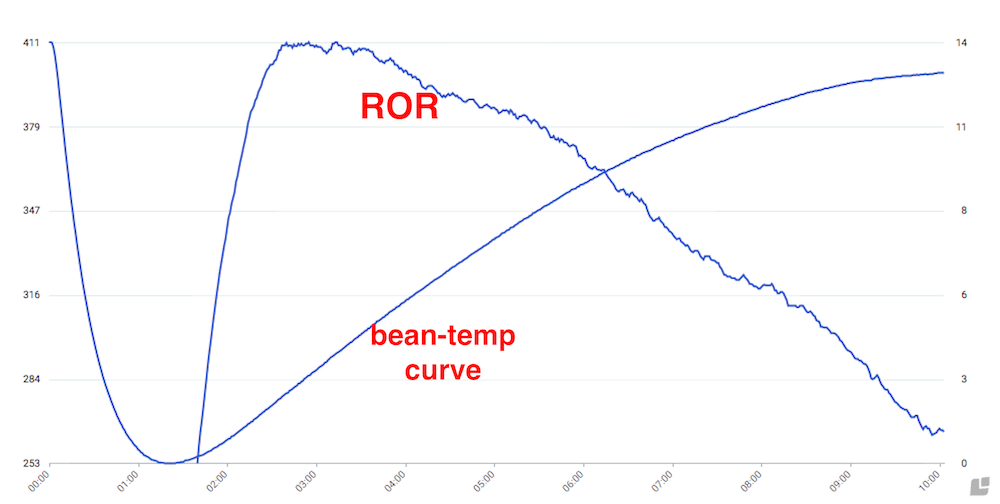
The key important thing to note here is that the temperature is ALWAYS RISING. Do not allow the temperature increase of the bean to go down under 0 ROR.
If it flatlines, your bean is dead… I’m joking of course but it will taste much worse.
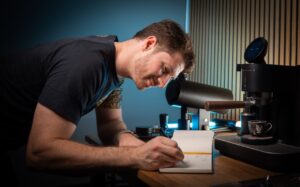
I usually listen to music or a podcast while I’m roasting and pay attention for the whole time. Don’t leave it for 15 minutes and go away and do something else.
While I’m sitting there, I slowly increase the temperature as I’m roasting to make sure that my temperature chart would look a bit like the one in the image above (if I were able to output to a temperature chart on a Gene Cafe Roaster).
Time
This will vary a lot based on the bean (mostly surface area and density) so practice roasting the same coffee beans and take notes as you do.
The main thing I want to say here is that the Gene Cafe is pretty suseptible to the weather, so on cold days or in winter your temperatures will drop a lot and you’ll need to roast for quite a while longer. I’ve gone up to 15 minutes to reach first crack, so just be aware of this.
To see how I roast my coffee on the Gene Cafe Roaster, take a look at the video at the top of this post. I hope this has been useful for you. If you like coffee and want to learn more, consider subscribing to my email list or YouTube to see new uploads as they come.
